County Fair Cutie

So, as I procrastinated, so much procrastination, I finally took a day to complete her. Yup, not even a whole day, more like 5 hours and she was done. I think I have something about finishing a doll. Subconsciously, I don’t want to complete them. It must be some psychological weirdness about them being finished, about there being no more to make, or something… There’s a second part to that as well, deadlines. I work so much better under a deadline, but if I miss a deadline, it can sit f-o-r-e-v-e-r before I touch the project again. Maybe someday I’ll delve into the why behind all that a bit more. But for today, back to the doll at hand.

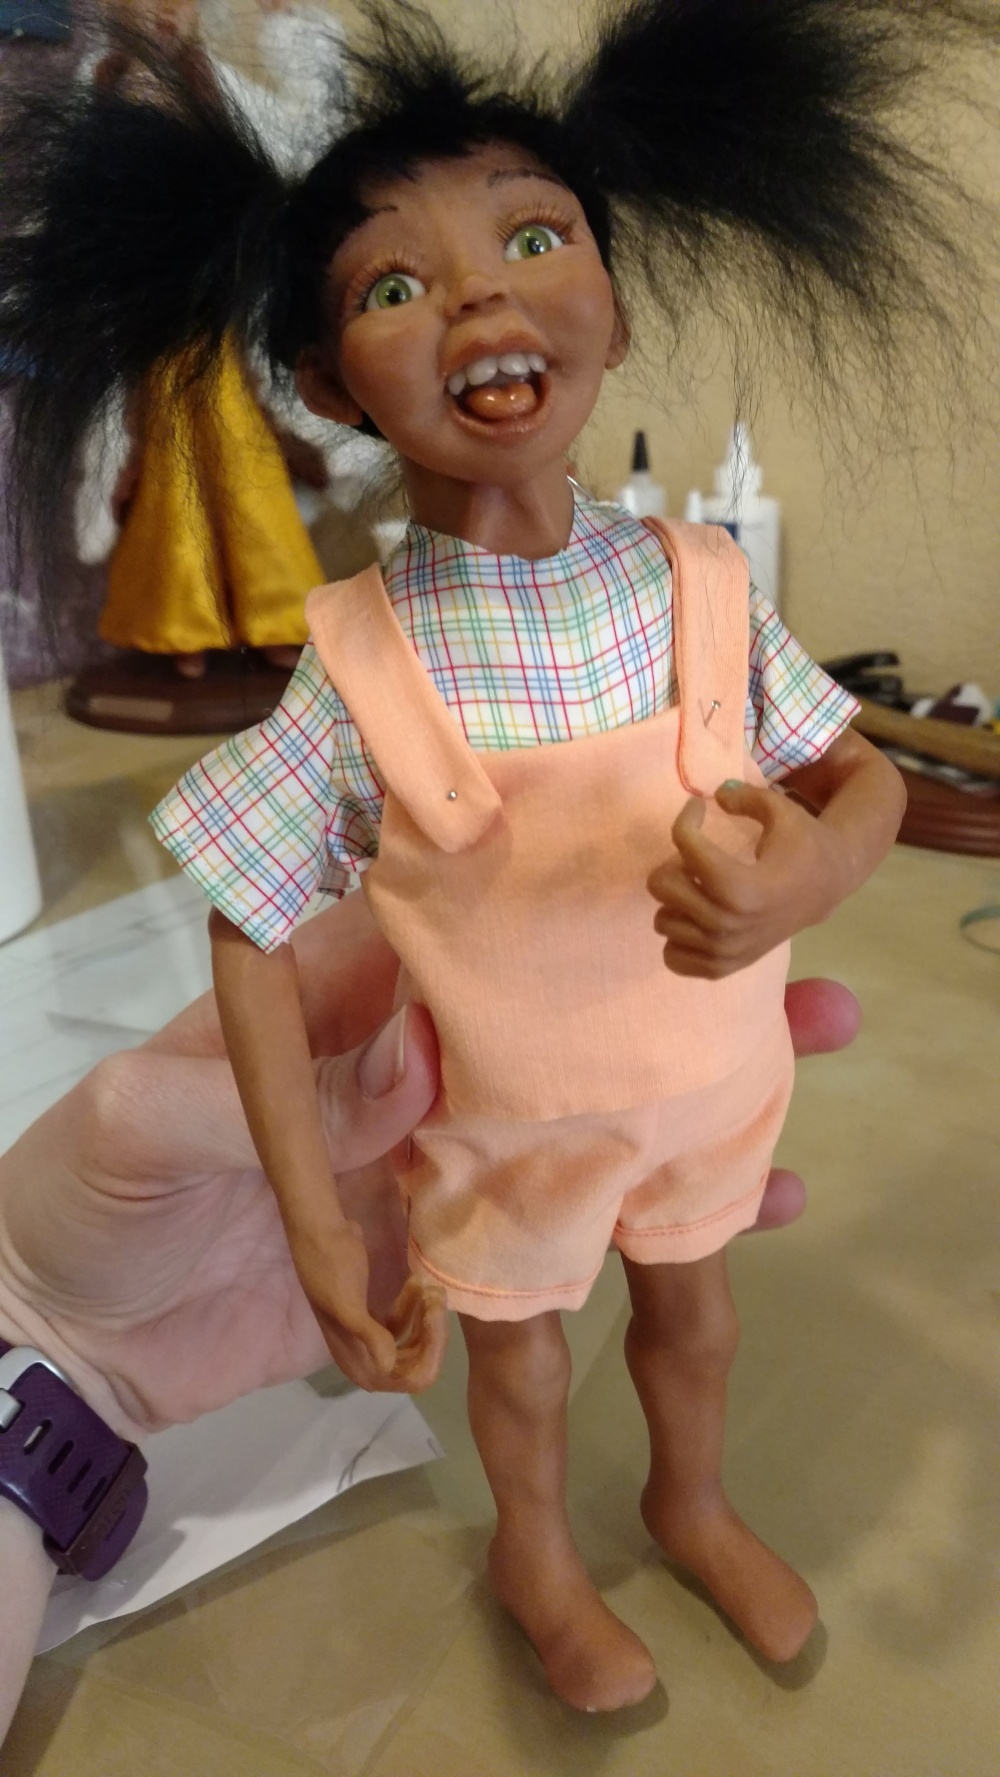
So I had to finish streamlining her costume, specifically the shirt fitting and the overalls to fit right. Her overalls were so big, they looked like a clown! So I cinched those in carefully, and using a ladder stitch sewed her clothing right on her. I fashioned some socks. I finished gluing her shoes and laced them up. I even made her a beaded bracelet.

I fixed up her hair. Had to add a little more on her head, and re-tie it into ponytails that were not as messy. It had gotten so messy from fussing with her clothing that it no longer looked like messy kid hair, and just like a rats nest. So I tied it up with some ribbon and trimmed her hair. She stands on her own, which is awesome. However, I still took the time to make a stand with brass rods in it to hold her. She is not going anywhere when she is on the stand, very solid! I put her cotton candy and her lizard on a wire in her hands, and *POOF* she was done. All that was left was taking some good photos.


And with that said, I’d like to introduce my County Fair Girl. I don’t have a name for her yet, but I’m sure one will come to me.

This slideshow requires JavaScript.

I found a little inspiration

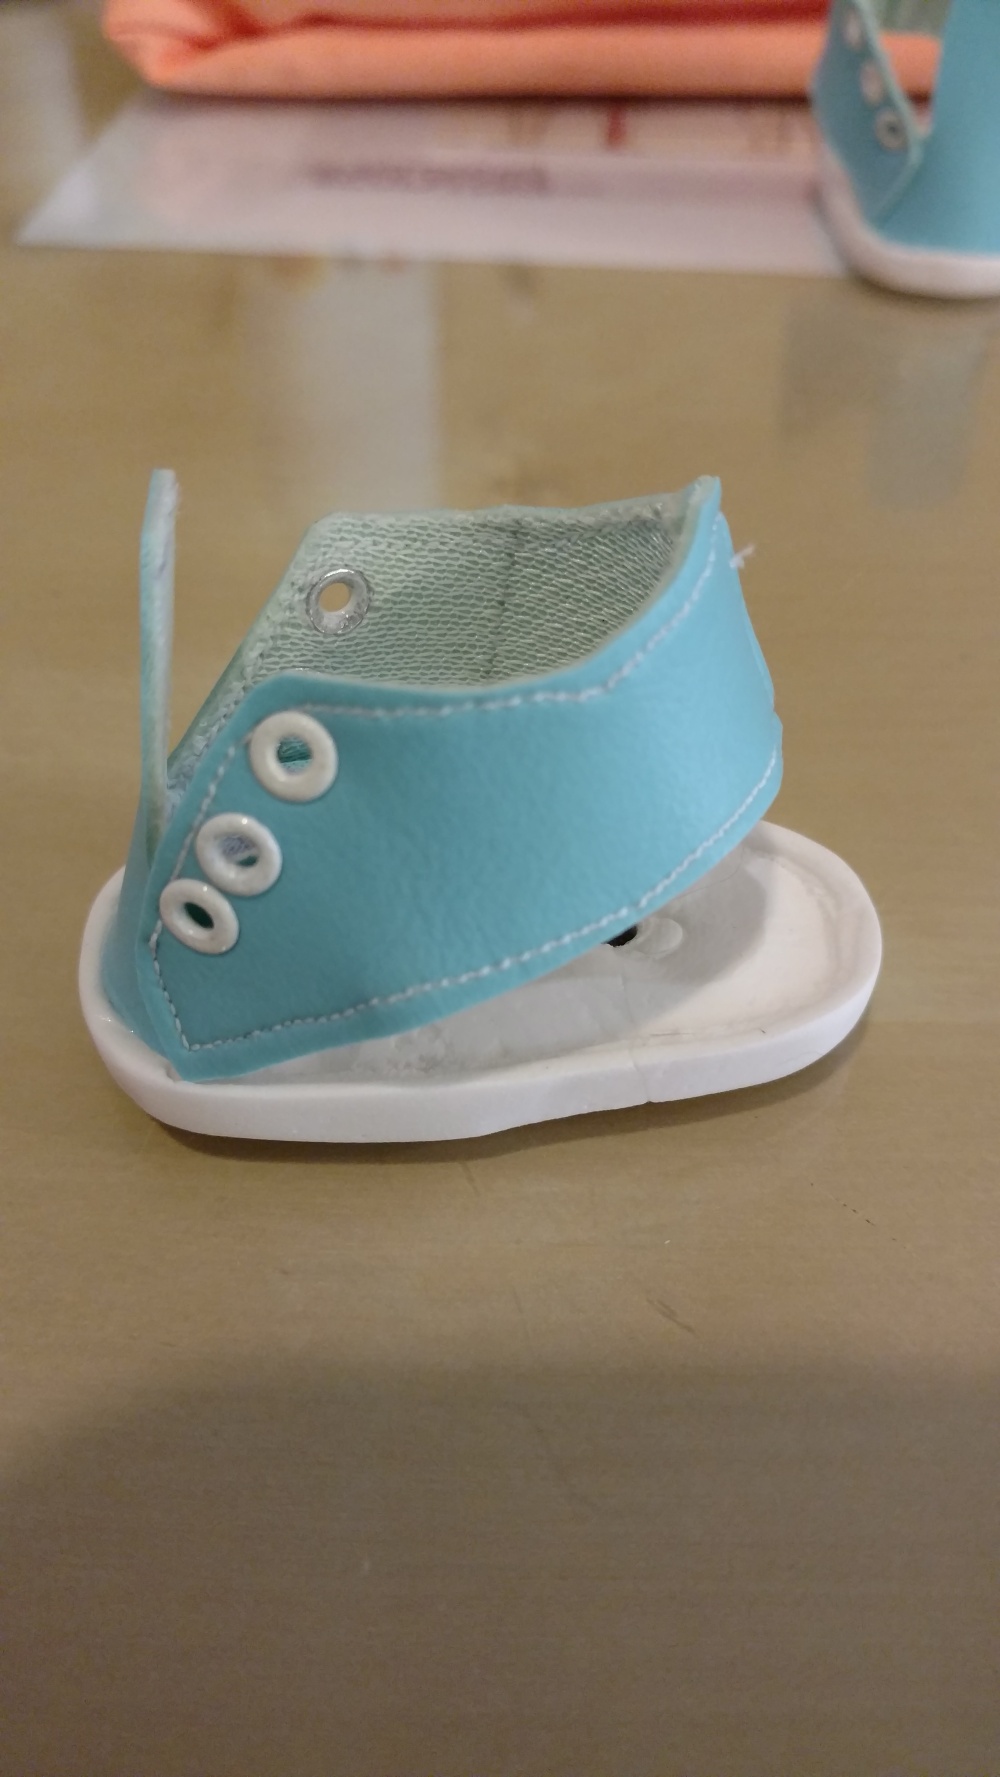
I finally found some inspiration and some time today. I worked on my County Fair Girl. Sanded the shoe soles and worked to begin gluing them together. Found that this was more difficult than I anticipated and will have to do it in stages.

img_20170303_143016905

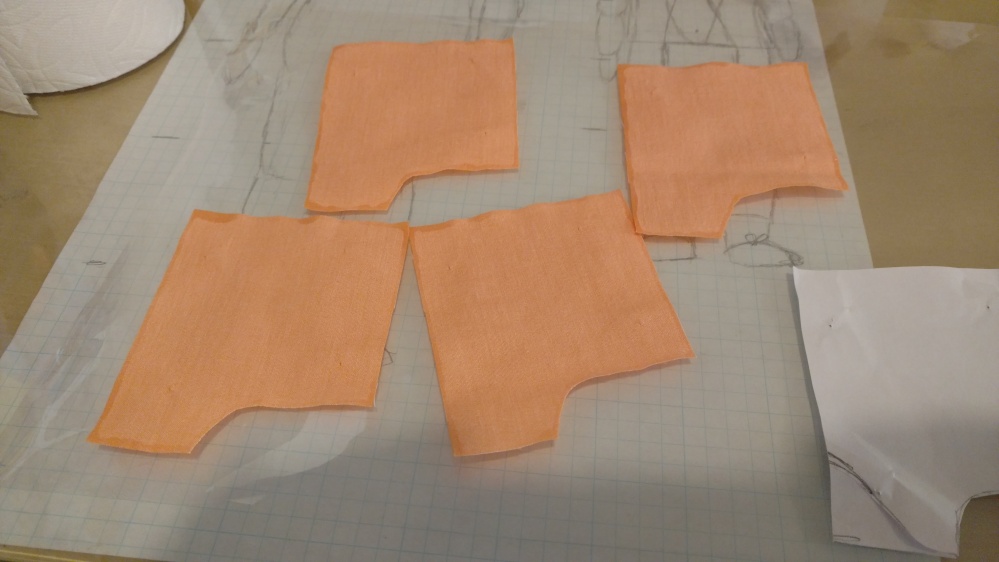
Then I worked on her clothing. I worked on her overalls today. I used Fray Check on the edges of the cut material, on the legs of the overalls, just like I had done on the top portion.

img_20170303_143024243

Then I sewed the top part to the lining, trimmed corners and turned right side out. I think I am going to do some top stitching on it to define the edges. I sewed the hem of the short legs and then sewed the legs together into shorts. Then I plated with putting it all on her. I will definitely need to make some adjustments, the legs are way too wide and big, and the back of the top part is too long. I pinned it all up to see what it should look like and discovered that her booty is still too big, but just on one side. So I took some time to try to remedy that by cinching down the cotton batting. We will see how it looks once I get the modifications done on the clothing and get the clothing all sewn together. But here’s a preview of what she will sorta look like when she is all dressed.

img_20170303_152303645

Reworking the body and clothes

Before the holidays I took the time to wrap the armature for my County Fair girl, and make her a shirt. However, after looking at it a while I decided it was all wrong. The shirt was too big, and the body extended too far down. So I took all the cotton batting off and redid the body and shirt. It is much better now. I also started working on the overalls she will be wearing, I’m using the same pattern I did for my little boy BJD, but with some minor modifications.

I’ve also worked on the shoes, making the soles out of clay and adding grommets to the material. I made the cotton candy using the wool I found. And I made the little walking lizard puppet. They are all awesome! But pictures for these will have to come later. I am hoping to get a few hours this week to work on her, and try to get another update posted here.

The downside to deadlines

So the downside to deadlines, especially contest deadlines, is that sometimes I don’t make them. I have known about this contest for probably 3 months, but as usual procrastinated. I missed the deadline, and the doll is still not finished. Here’s my silver lining, I am making her the way I want her to be, and taking my time to make her awesome.

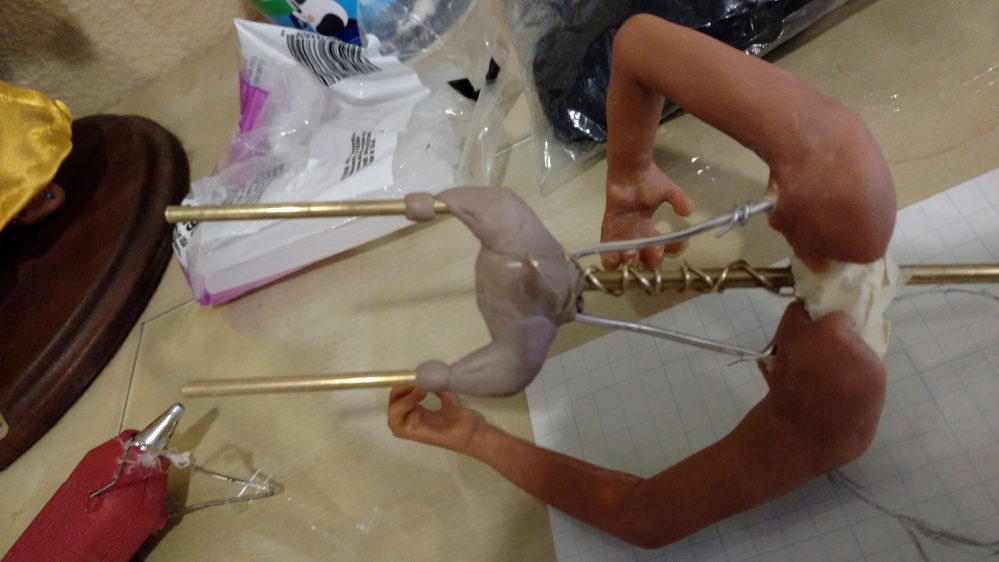
I had made a new hand and attached it, however the angle was too severe; when I put her together the cotton candy would sit right in front of her cute little face. So I broke her wrist, using an Xacto to gently carve it out, and re-positioned and re-sculpted the wrist. It is in a much better position now. The only downside is there is a hairline fracture that I cannot fix. So I will make her a little bracelet to cover the crack. I added a little extra 2-part epoxy to the hips to solidify the position.

img_20161215_094343834

I was playing with ideas on how to make the cotton candy. I was originally thinking I would use some Polyfil and try to color it using pigments. It looked ok, but was not what I had in mind. I also tried some Sharpie on a piece of spare foam for the lizard, this worked well. So I went over to Hobby Lobby to get some supplies. While there I found some wool roving in a variety of colors and decided to try to use it to make the cotton candy. This worked so much better than the Polyfil, and was already colored! I used Sharpie to color the lizard, and attached the wire lead to it.

I also worked on her hair, creating wefts of hair from Tibetan Lamb wool. I straitened the hair using a flat iron. I glued the wefts onto the head and styled her hair into the basic idea of what I wanted. I will fine tune her when I have everything done. I also used china paint to color her and a bit of gloss glaze on her tongue. I added eyelashes, which is a painstakingly careful process, but it really makes a difference.

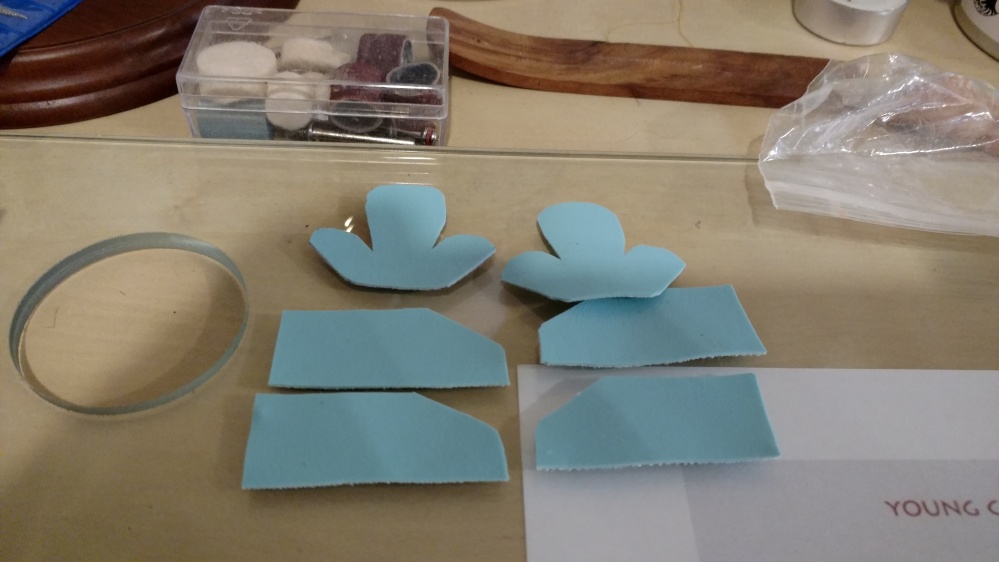
I wrapped the body armature with cotton batting to bulk out the body. I painted her fingernails. And then I started on clothing. I used a pattern and adjusted it to make her shoes. I sewed the pieces together for authenticity. I added little tiny grommets for the laces. I used the lightweight clay to make soles and carefully carved them into shape. They still need works and to be finally assembles, but these shoes are cute! I also cut out her shirt and began sewing it.

img_20161215_094338541

I worked for 12 hours yesterday, and only about 2 today. I have to say that I am quite pleased with her.

I took a break

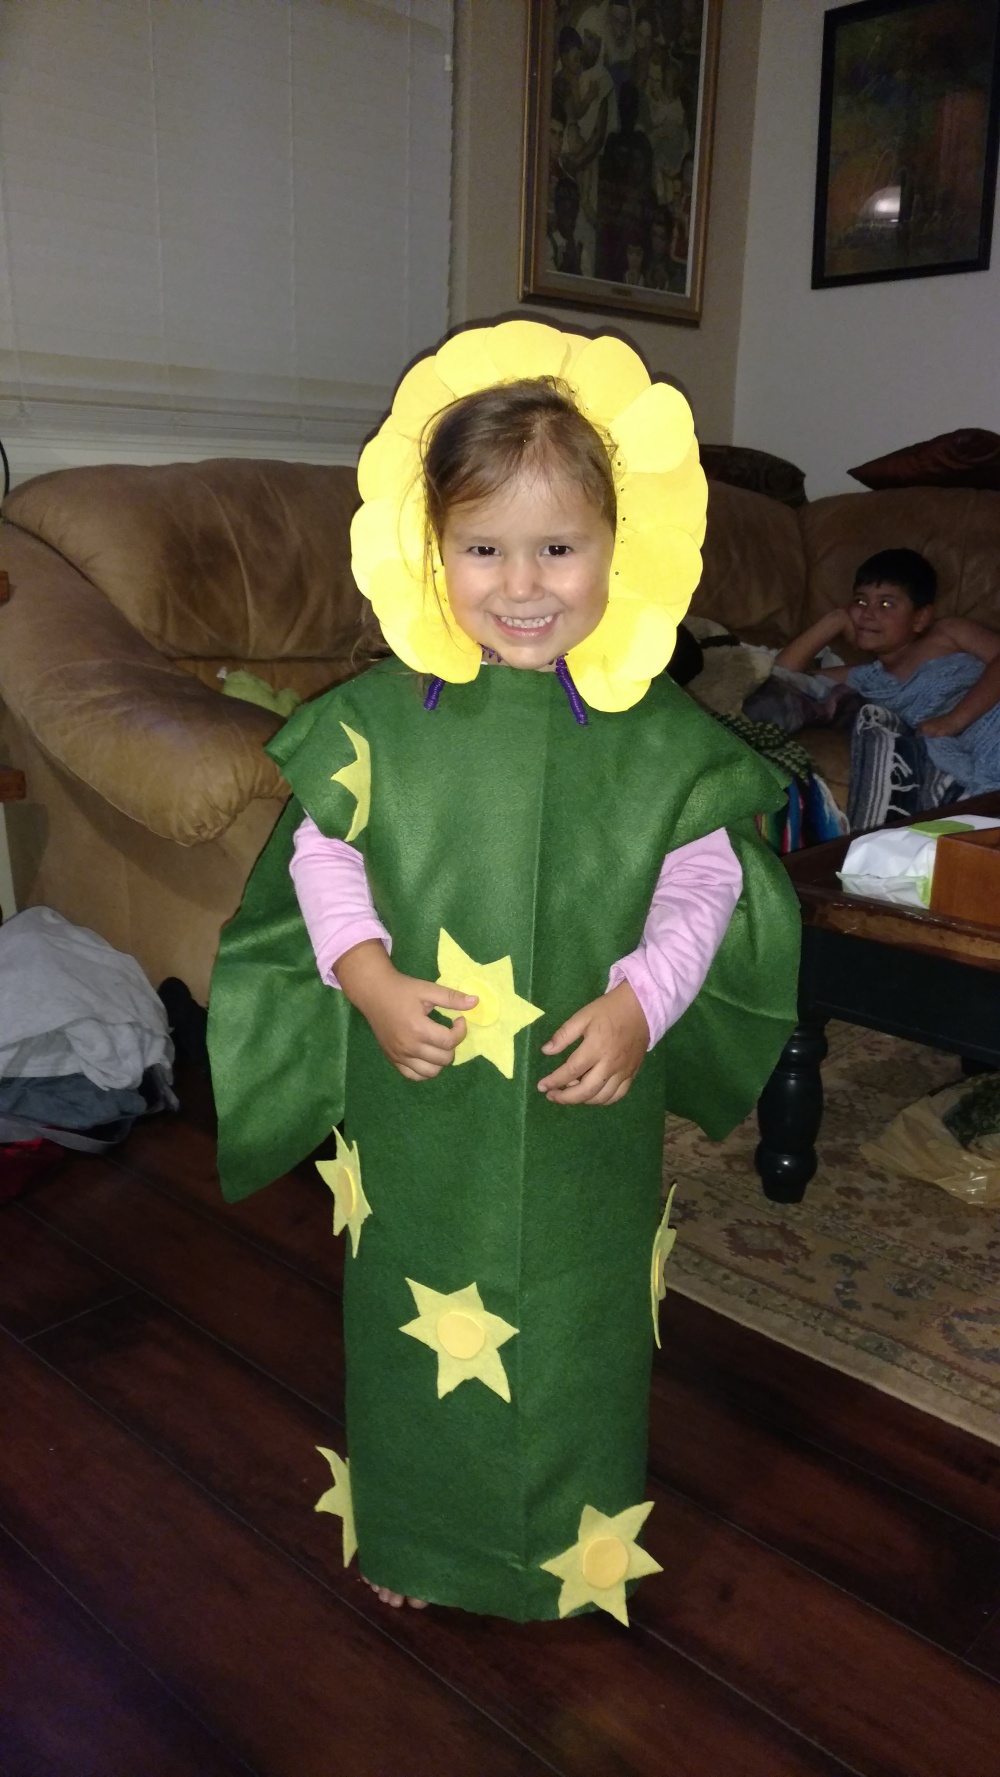
I found myself lacking inspiration for quite some time, so I took a break. However, I thought I would share a fun little project with you I did right before Halloween. I helped my cousin out by making some awesome Halloween costumes for her kids. It was all an experiment, but they turned out very awesome!

The boys wanted to be zombies and the little girl wanted to be a sunflower (Plants Vs. Zombies). Too cute! But there was no way I was just going to do a little make-up, oh no! So I went for it. I made a metal mesh frame and used spray insulation foam to make the heads. I had to remove all of the wire mesh after the fact, as I discovered the foam had not penetrated the way I had hoped and I didn’t want these little guys cutting their faces. My hands, however, got sliced up pretty bad. Then I took a disposable breakaway razor blade and carved the heads into shape. I had to use some Foam Smooth Finish I had lying around to fill in a few gaps.

Next up came the painting, and I’ve never been very good or patient with spray paint. So my boyfriend was up to bat. He sprayed the heads and they looked awesome. While he sprayed, I painted the eyes. Using clear plastic sphere ornaments that split into two hemispheres, I painted on the inside using acrylics and allowing it to dry between the black pupil and the whites of the eye. These were glued onto the head. We lined the inside with felt, and the boys added some pipe cleaner “hair” and a foam traffic cone to one of them. One of the boys wanted the brain to be exposed a bit, so I went back at the head and carved out a section of the skull to make it look brain-like, then painted it.

The little girl’s costume was much easier, we made a simple headband with some foam to make her head look like the sunflower. Then a simple felt dress with some felt suns glued on.

img_20161029_201815376

It was a fun project, and I thought you all might enjoy it.

This will be the last post for a while…

Sorry it’s been so long.  I am back in class on campus, and have been crazy busy.  But I did want to share with you the finished child BJD.

Today I finished sewing together his overalls and gave him a haircut.  The haircut wasn’t as easy as I thought it would be, but it’s done.  I decided he is cute with and without the hat, so it has become an accessory.  He doesn’t have a name yet, but it will hopefully come to me soon.  So here he is…

This slideshow requires JavaScript.

Now I am off to work on a presentation of my research and finish writing my thesis…  Presentation tomorrow and thesis is due for final review on Monday, crunch time!

All that’s left..

…is a costume and a hair cut.

Today I started out making hair for the wig. I made the wig cap last night, using the same technique as the previous BJD.  I decided the magnet embedded in the head was not quite strong enough to catch the metal in a wig cap, so I embedded a second magnet in the wig cap.  Works like a charm.  The wig took me the longest to make today, about 5 hours, I think.  I made over 100 hair wefts (I thought I took a picture of these, but apparently I didn’t).  And it wasn’t your normal weft either.  I actually used 2 different colors of hair, a darker blonde and a bleach blonde.  And I used a straight iron in every section of hair before adding the glue to make the weft.  But the result, amazing.  Still needs a haircut, but the wig really worked well.

IMG_20160610_134604463

Then I wiped down all the pieces with acetone.  I’m not 100% sure how this works.  It takes out any remaining fine scratches from sanding and cleans the clay a bit.  I have heard that it sort of melts the top layer.  Next, I did a little bit of painting with china paints, around the joints, hands, feet, torso, and face.  I wanted his feet and hands to look dirty. like he’s been playing outside, so I added a bit more brown.  The picture of the feet shows one that has been painted (right) and one that has not (left).  The image doesn’t do justice to the difference, but you can tell there is one.  I also painted eyebrows with acrylic paints.

Then I worked on stringing him up.  This was a bit of a challenge.  I used 2mm elastic. The elastic was a little thick, but I wanted it to be sturdy.  Also, his upper arms were tricky, that joint always is.  I used various lengths and gauges of wire to feed the elastic through everything.  I think his arms look a little long, as does his torso.  Also, the shoulder joints stick out too far.  The joints do move, but the range of motion is minimal, I’ll have to do some more research for the next one.  Nothing I can do about all of this now, short of sculpting new pieces, but good to know for future reference.  The thing that makes me wonder…I followed the proportions guide to a “T” when making the pattern.  and the pattern doesn’t look weird, just the doll…  I am hoping he will look better when he has his clothes on.  And yes, he stands all on his own.

IMG_20160610_160025500

I was playing around with the wig, and made this funky rock star baby, and funky country rock star baby with a straw cowboy hat…  Yea, I think I’m tired.  No, this is not what the wig will look like when I am done, but it was still fun.

Then after a little break, I found patterns for the clothes and cut out the pieces.  I am going to make a simple t-shirt and a pair of overalls. I spent 45 minutes looking for my buttons.  I organized myself a few weeks back, and unfortunately forgot where the buttons were.  Went through everything, twice, and eventually found them in a sewing bag.  Now just to choose which color to go with the outfit.

IMG_20160610_180813308

Not too bad for 4 days of work.  Won’t have much time, if any this weekend, and I am back in class on Monday.  Hoping I will be able to find a little time in the evenings to work on him next week.  A little overlap of thesis writing and art making research is okay, right?

I’m spent

So I haven’t had a lot of time over the last few days…three day weekend threw everything off.  But I did get some work in on the baby doll yesterday, about an hour.  And I spent all day sewing today, and I’m spent.

Yesterday, I gave the doll a hair cut.  I trimmed it down, as babies don’t have long locks of hair.  I tried to thin it out a bit, but resolved that this baby would just have a lot of hair.  I think if I do any in the future, I may keep them bald…  I attached the head to the body, which I found a little creepy. I also prepped some of the materials for the clothing.  Using the pattern pieces I found online, I cut out the dress and undergarments.  I sealed the edges with Fray Check.

Today, I jumped right into the sewing.  I decided I needed a lining for the dress, and so cut out the pieces of the dress in a sheer material, Fray Checked them and left it to dry.  Meanwhile, I cut a 12″ square of thin fleece and a 15″ square of a lady bug cotton.   Laying the fleece in the center of the square of ladybug, with the lady bugs facing down, I folded up the edge of the lady bug cotton to create a binding around the edge, and sewed it in place.  This made a little blanket for the doll.  Then I worked on sewing the dress.  I am fortunate that I learned to sew when I was a kid.  and I am fortunate that I have sewn some very complex things.  Most of the time, when it comes to the dolls, I may have a general pattern, but I always have to adjust it.  The dress took me most of the day, sewing the lining in place, then constructing the dress, and finally adding lace and trim.  Then I made the bloomers.  I actually had to make two pairs, as the first one was too small and would not fit on the leg.  The second one I made much larger, and it still is not quite right.  I added some lace trim to these as well.  I also trimmed off the excess zip ties that hold the clay pieces in place on the soft body.

Tomorrow, I will paint, clothe, and decide on any extra embellishments.  I am down to 6 days (scheduled working time) to complete this and one other doll.  Talk about down to the wire.

Sculpting of the baby doll – Check

So today I hammered out the rest of the baby doll sculpting.  I started with the arms, which included the hands.  Now, let me say this, sculpting without an armature is a bear.  The arm and hands are sculpted from one piece of clay.  You start with a tube of clay, with one end narrower than the other.  Then you pinch down the palm of the hand.  Next, you add fingers.  Then comes all of the detail work, and it’s so small it’s hard to get it all in, fingernails, joints, lines in the palm.  By this point my clay was so limp, I couldn’t work with it any more.  Solution?  Put the clay in the refrigerator.

After it had cooled I was able to fashion the rest of the arm, elbow, and baby fat wrinkles.  I made the second arm the same way then baked them both.  I did end up going back and adding a little bit of baby fat in a few places, I just didn’t like how skinny they were.

The legs are made in the same manner.  A long tube, thinner on one end, then flatten out a foot shape.  Then comes the detail of sculpting toes, toenails, lines in the foot.  Again, my clay became so soft I couldn’t work with it, so in the leg went into the fridge.  When it was cool, I added wrinkles around the foot and created the knee joint (adding baby fat wrinkles here too).  I made the second foot/leg in the same manner then baked them up.  I also added clay to the inner thighs and “beefed” up the baby, re-baking them when I was done.

IMG_20160526_150941586

In addition, I tweaked the face.  I added a small ball of clay to the tip of her nose.  I added a little bit of clay around the cheeks and the chin, so that I could add the little dimple in the chin that apparently babies have (this was a suggestion from the Academy mentors). Can you see the difference?  It’s really subtle.


When everything was done, I wet sanded all the pieces to ensure they were smooth, even the face.  So I now have a head, two arms and two legs, all ready to put the doll together.  I have the body stocking, although I’d like to get some plastic pellets to weight the doll. I have decided on material for a little dress and picked the hair color (although since this is a baby, I am tentative about applying the hair, as it is so thin).  I even found a pattern online to adjust for the dress.

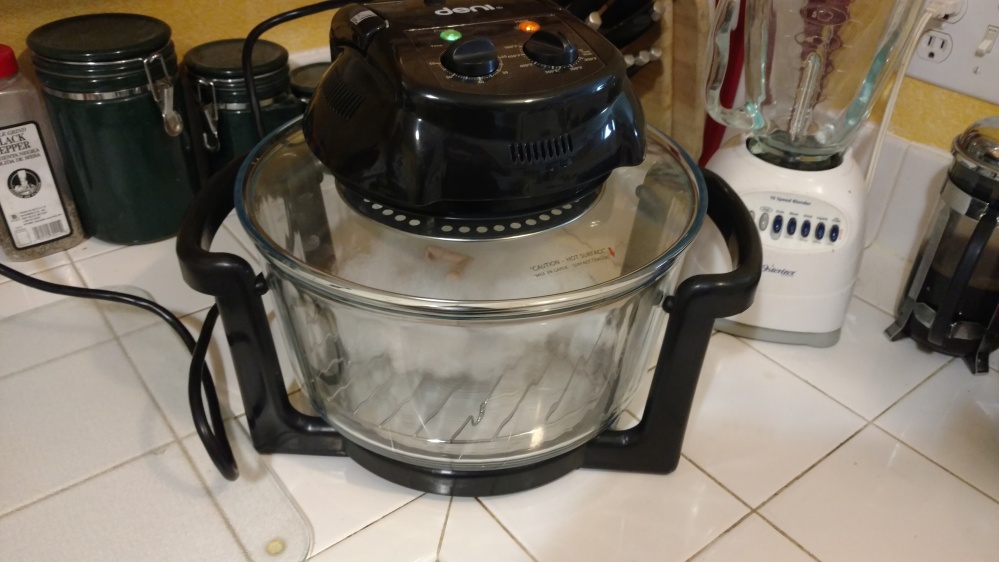
I don’t know if I have mentioned this, but I use a counter top convection oven to bake all my pieces.  I love it because it is small, portable, doesn’t use a ton of energy, and doesn’t heat the whole house up.  I place a small amount of Poly-fil on the bottom of the oven to support my pieces while I bake them.  It is just perfect for me.  If you look carefully, you’ll see an arm in there…

IMG_20160526_111154629

Done, with 2 dolls!

I took the time to finish up on the last 2 works, the fairy and BJD.  I really didn’t do much with the fairy, I decided she looked pretty good and just went with photographing her.  Her name has yet to reveal itself to me, I’m hoping it will come to me soon.

This slideshow requires JavaScript.

The BJD on the other hand, had a lot of fine tuning to do.  First up was finishing her dress.  I gathered the skirt and sewed it onto the top.  I then played with how to get it on and off of her and figuring out how I wanted the arm straps to lay.  I decided on a cris-cross back.  Sewed up the hem and called it good.  I am really oversimplifying here…

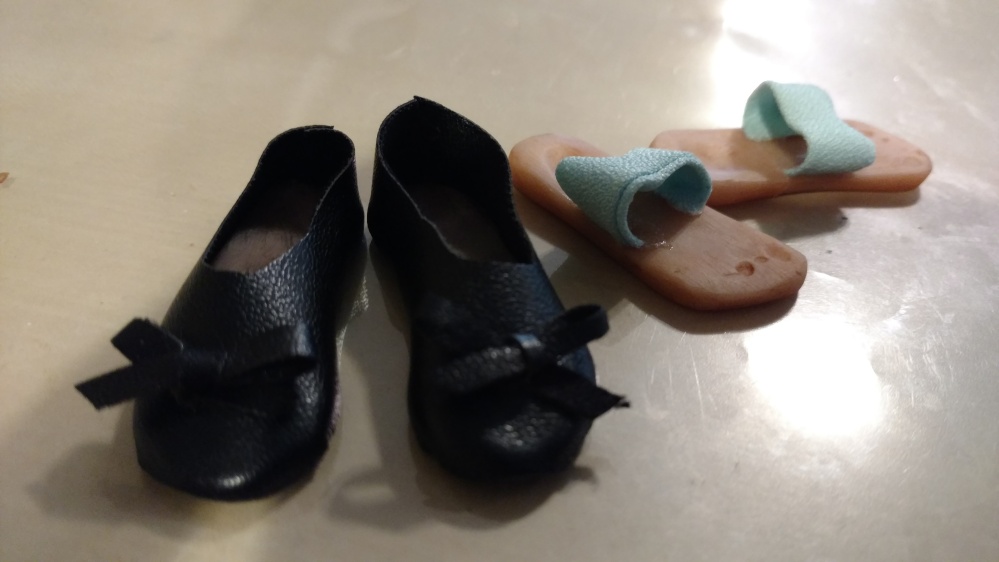
After the dress I worked on making her some shoes.  This meant researching and finding possible solutions and patterns.  I found a couple patterns and saved them.  I traced around the foot of the doll to create a basic outline for a sole.  Then, using Super Sculpey, I flattened out the clay, and pressed my design into the clay, leaving behind a faint pencil outline.  I cut these out and adjusted them a bit.  For the sandals, I imprinted the dolls foot (which made a huge difference in them fitting snugly, by the way).  I made a second pair for another set of shoes using the first set of soles as a pattern.  I baked these up, and then waited for them to cool.  Once they were cool, I wet sanded them, just enough to smooth out the edges.  Then, using acrylic paint, I painted both sets with a wash.

Now, the sandals, I used a little bit of Fabri-Tac on a toothpick to place the strap on one side of the sole.  I allowed that to dry for a while, and did the same to the second shoe.  Using the same technique, I wrapped the fabric around to form a strap and secured it in place.  I had to add a little bit of Fabi-Tac to hold the edges down, but I have to say I really like this pair.

The black flats were not as easy.  I had cut out a piece of material and secured it to the sole with a fine line of Fabri-Tac, only to discover that the material sat funny and would not go completely onto the sole.  So I tore it off.  Using the existing pattern piece, I cut and adjusted where there was a discrepancy.  The second try was much better.  I used a thin line of Fabri-tac around the edge of the fabric, then carefully pressed it in place on the sole.  After the shoes were constructed, I tried them on the doll.  This pair does not fit as well and there was a definite bump where her toes ended.  Solution?  Add a small bow of the same material onto the shoes.  While I’m not totally thrilled with the shoes, I am happy enough to call it done.
IMG_20160518_131024655

So then I thought I was finished, and as I was getting her dressed for her photo shoot, I realized she still had no eyebrows.  So out came the paints again.  I got to use my 2 new tools from Apryl, a rubber ended tool and a teeny-tiny paintbrush.  I decided to give her a little eyeliner using the teeny-tiny paintbrush and some black.  Then I mixed a magenta and a brown to get her eyebrow color close enough to her hair color.  Using the rubber tipped tool, I carefully “drew” eyebrows onto her face.  Her left (my right) came out great the first time.  However, I had to redo her right (my left) several times.  I used acetone to clean the paint off when I didn’t like the results.  Eventually, i was satisfied with the way it looked.  The I also decided to add eyelashes.  I had tried on the fairy and destroyed an entire strip.  But I really wanted to put eyelashes on this one.  So I took the strip and using a q-tip and some acetone, gently swabbed the sticky stuff off the eyelash.  Then with a pair of fine tip tweezers, a toothpick, scissors, Gorilla Glue and a lot of patience, I attached eyelashes to the upper lids of the doll.  Then I touched up the china paint a bit on her cheeks and lips, as I felt that they were a little too light after adding all of that detail to her face.  She looks kinds funny without her hair though…

IMG_20160518_150056804

Then it was time for her photo shoot.  She has interchangeable outfits, so I tried to get all of them photographed the best I could.  She has, also, yet to reveal her name.  But she is done.

This slideshow requires JavaScript.