County Fair Cutie

So, as I procrastinated, so much procrastination, I finally took a day to complete her. Yup, not even a whole day, more like 5 hours and she was done. I think I have something about finishing a doll. Subconsciously, I don’t want to complete them. It must be some psychological weirdness about them being finished, about there being no more to make, or something… There’s a second part to that as well, deadlines. I work so much better under a deadline, but if I miss a deadline, it can sit f-o-r-e-v-e-r before I touch the project again. Maybe someday I’ll delve into the why behind all that a bit more. But for today, back to the doll at hand.

So I had to finish streamlining her costume, specifically the shirt fitting and the overalls to fit right. Her overalls were so big, they looked like a clown! So I cinched those in carefully, and using a ladder stitch sewed her clothing right on her. I fashioned some socks. I finished gluing her shoes and laced them up. I even made her a beaded bracelet.

I fixed up her hair. Had to add a little more on her head, and re-tie it into ponytails that were not as messy. It had gotten so messy from fussing with her clothing that it no longer looked like messy kid hair, and just like a rats nest. So I tied it up with some ribbon and trimmed her hair. She stands on her own, which is awesome. However, I still took the time to make a stand with brass rods in it to hold her. She is not going anywhere when she is on the stand, very solid! I put her cotton candy and her lizard on a wire in her hands, and *POOF* she was done. All that was left was taking some good photos.


And with that said, I’d like to introduce my County Fair Girl. I don’t have a name for her yet, but I’m sure one will come to me.

This slideshow requires JavaScript.

Technology blip

So for whatever reason, my computer will no longer recognize my photos on my phone. I tried several different solutions per the web, to no avail. So I made my own solution, I am in the process of uploading everything to the cloud and then downloading them to my computer. Not exactly a short process, but it’ll have to do for now.

So with that said, here are the images I took yesterday of the fairy. The blended clay, the armature after I reworked it and wrapped it up, and the kit with all the goodies for the contest.

This will be the last post for a while…

Sorry it’s been so long.  I am back in class on campus, and have been crazy busy.  But I did want to share with you the finished child BJD.

Today I finished sewing together his overalls and gave him a haircut.  The haircut wasn’t as easy as I thought it would be, but it’s done.  I decided he is cute with and without the hat, so it has become an accessory.  He doesn’t have a name yet, but it will hopefully come to me soon.  So here he is…

This slideshow requires JavaScript.

Now I am off to work on a presentation of my research and finish writing my thesis…  Presentation tomorrow and thesis is due for final review on Monday, crunch time!

The baby doll is done

Today I did some minor things, like blushing the doll with china paints and adding eyebrows.  It’s amazing how much of a difference a tiny bit of rosy pigment makes for the overall composition.  Then I dressed her up and photographed her.  She has taken me the least amount of time…taking just around 30 hours to complete.  I’m definitely getting faster.

I will say, I am not fond of her hair, although it is growing on me.  It just doesn’t look the way I saw it in my head.  But it’s all a learning game.  I do think that I may make a few more baby dolls after grad school is done and see if I can sell them.  This is partially because they seem to be the ones that take me the least amount of time, and partially because I really want to break into the market.

So without further ado…here is Madison Leigh.

This slideshow requires JavaScript.

Done, with 2 dolls!

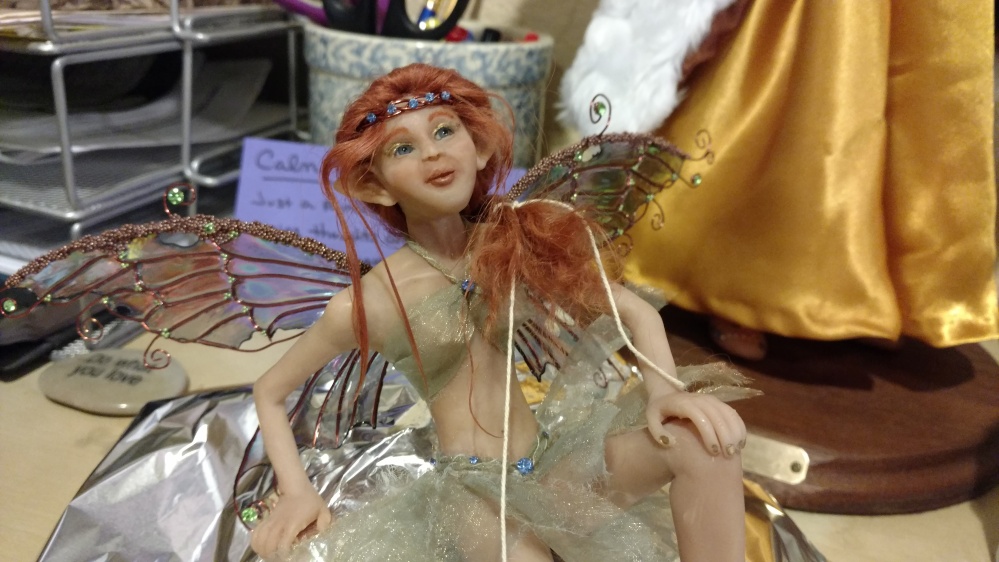
I took the time to finish up on the last 2 works, the fairy and BJD.  I really didn’t do much with the fairy, I decided she looked pretty good and just went with photographing her.  Her name has yet to reveal itself to me, I’m hoping it will come to me soon.

This slideshow requires JavaScript.

The BJD on the other hand, had a lot of fine tuning to do.  First up was finishing her dress.  I gathered the skirt and sewed it onto the top.  I then played with how to get it on and off of her and figuring out how I wanted the arm straps to lay.  I decided on a cris-cross back.  Sewed up the hem and called it good.  I am really oversimplifying here…

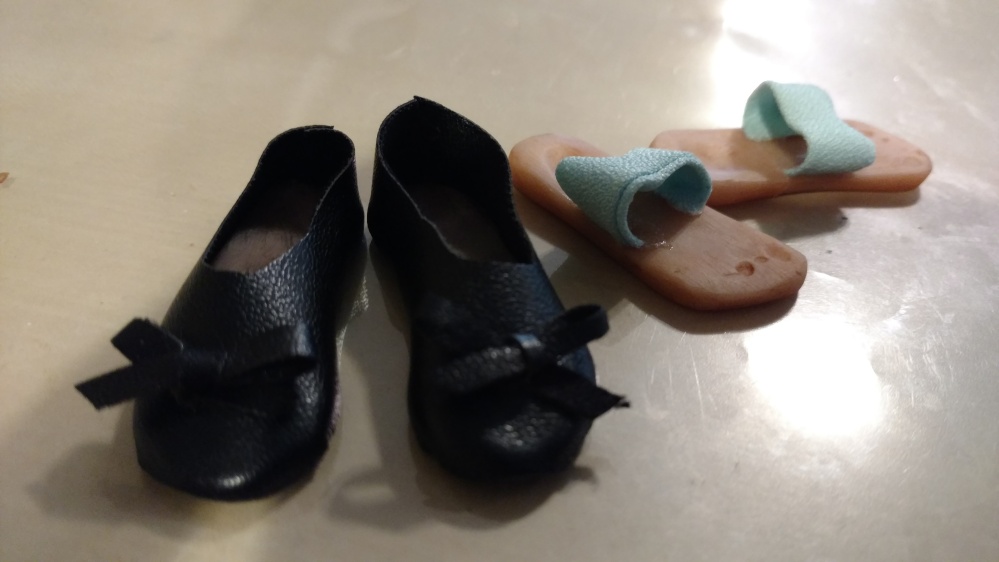
After the dress I worked on making her some shoes.  This meant researching and finding possible solutions and patterns.  I found a couple patterns and saved them.  I traced around the foot of the doll to create a basic outline for a sole.  Then, using Super Sculpey, I flattened out the clay, and pressed my design into the clay, leaving behind a faint pencil outline.  I cut these out and adjusted them a bit.  For the sandals, I imprinted the dolls foot (which made a huge difference in them fitting snugly, by the way).  I made a second pair for another set of shoes using the first set of soles as a pattern.  I baked these up, and then waited for them to cool.  Once they were cool, I wet sanded them, just enough to smooth out the edges.  Then, using acrylic paint, I painted both sets with a wash.

Now, the sandals, I used a little bit of Fabri-Tac on a toothpick to place the strap on one side of the sole.  I allowed that to dry for a while, and did the same to the second shoe.  Using the same technique, I wrapped the fabric around to form a strap and secured it in place.  I had to add a little bit of Fabi-Tac to hold the edges down, but I have to say I really like this pair.

The black flats were not as easy.  I had cut out a piece of material and secured it to the sole with a fine line of Fabri-Tac, only to discover that the material sat funny and would not go completely onto the sole.  So I tore it off.  Using the existing pattern piece, I cut and adjusted where there was a discrepancy.  The second try was much better.  I used a thin line of Fabri-tac around the edge of the fabric, then carefully pressed it in place on the sole.  After the shoes were constructed, I tried them on the doll.  This pair does not fit as well and there was a definite bump where her toes ended.  Solution?  Add a small bow of the same material onto the shoes.  While I’m not totally thrilled with the shoes, I am happy enough to call it done.

IMG_20160518_131024655

So then I thought I was finished, and as I was getting her dressed for her photo shoot, I realized she still had no eyebrows.  So out came the paints again.  I got to use my 2 new tools from Apryl, a rubber ended tool and a teeny-tiny paintbrush.  I decided to give her a little eyeliner using the teeny-tiny paintbrush and some black.  Then I mixed a magenta and a brown to get her eyebrow color close enough to her hair color.  Using the rubber tipped tool, I carefully “drew” eyebrows onto her face.  Her left (my right) came out great the first time.  However, I had to redo her right (my left) several times.  I used acetone to clean the paint off when I didn’t like the results.  Eventually, i was satisfied with the way it looked.  The I also decided to add eyelashes.  I had tried on the fairy and destroyed an entire strip.  But I really wanted to put eyelashes on this one.  So I took the strip and using a q-tip and some acetone, gently swabbed the sticky stuff off the eyelash.  Then with a pair of fine tip tweezers, a toothpick, scissors, Gorilla Glue and a lot of patience, I attached eyelashes to the upper lids of the doll.  Then I touched up the china paint a bit on her cheeks and lips, as I felt that they were a little too light after adding all of that detail to her face.  She looks kinds funny without her hair though…

IMG_20160518_150056804

Then it was time for her photo shoot.  She has interchangeable outfits, so I tried to get all of them photographed the best I could.  She has, also, yet to reveal her name.  But she is done.

This slideshow requires JavaScript.


She’s done…mostly

Today I finished up the fairy.  The first thing I had to do was sort out my gemstones.  Note to self: never buy a mixed bag of gemstones…  I suppose I could have left the all mixed up, but since I wanted just one color from the bag, it made sense to pull them all out and organize them.  Luckily for me, I’m patient and have little baggies to store things like this in.  I know it looks like there are 2 piles of blue, but one is more a medium blue and the other more aqua blue.

I then decided to fiddle with paint, trying to give her some definition around the eyes.  I used an acrylic wash, .  When it was dry, I scraped the excess off her eyes.  Unfortunately, I over did the black, so I used acetone to strip some off.  In the process, I stripped her check makeup.  So I wound up having to redo her china paint on the checks.  But I think the coloring is better now – it was too dark before.  I also added one more layer of spray paint to the rock.

After all that fussing with paint and organization, I took to the process of added the gemstones to the costume.  I placed each stone on the headband, clip in the back of her hair, and costume, one at a time using tweezers.  I do not have the right kind of tweezers – still waiting for them to come in.  So I used my regular tweezers, so it took a while to get the hang of it.  The gemstones are so tiny and they are beveled on the back, so picking them up and keeping them flat was an issue.

The last thing I did today was to attach the wings.  I know a lot of doll makers will make wings that are removable.  I couldn’t figure out how to do that, just yet.  So I instead glued the wings in place using The Ultimate glue.  I have her resting on her rock (covered in foil, as I don’t want her to stick to the rock and the paint has not cured yet).  I propped the wings in place and will leave her for the weekend.  If I have a chance over the weekend, I might go in and reinforce the wings where they attach on the back.  But overall, she is finished.

IMG_20160506_143829126

I am going to construct a photo light “studio” so I can take really awesome photos of all my sculptures.  One of the PDMAG Academy mentors shared this video on how to make one using a box and some tissue paper.  I think I will try my hand at it, and if it doesn’t go well, I suppose I can always buy one.

So up next…

  • Finish clothing for BJD
  • Make a baby doll
  • Make at least 1 child doll (I planned to do 2, but I only have a month to have them done for Grad school).
  • Write narrative stories for all 5 dolls
  • Finish synthesizing the data and analysis of my research and put it all into my thesis

And when Grad School is done?  Then I can continue exploring and making dolls.  I’ll continue with the PDMAG Academy, until they think I am ready to graduate.  then I’ll be on my own with making the dolls. The biggest difference will be, I will be working for fun instead of working for school.